
Sometimes you may face an error code 0xc0000034, “The Boot Configuration Data file is missing.” This is quite annoying error you may get and so it has to be fixed as soon as possible. Windows uses Boot Configuration Data (BCD) file for boot-time configuration. This is nothing but just a replacement of Windows XP’s boot[dot]ini file. When the Boot Configuration Data file becomes corrupt or is missing, the Window will not be able to start. In some cases, the error is generally fixed using the Installation Media for your operating system.
If your system or laptop’s Boot Configuration Data file gets damaged, missing or even corrupted because of any external or internal reasons then the Windows will not be able to boot anymore.
The most common trick you can apply to fix this error is using the Installation Media as per the version of your operating system. After fixing this issue, your data will not get affected and you can get it all back then so don’t worry at all.
At first, you will need a DVD or USB stick storing Windows installation media then download utility from Microsoft here that will create Windows Installation Media. But now you can easily solve ‘Boot Configuration Data File is Missing’ in Windows 10 with simple but effective tricks.
Automatic Repair
When Windows setup screen shows up, select language from there and time and currency format and the keyboard or input method. After this, click Next.
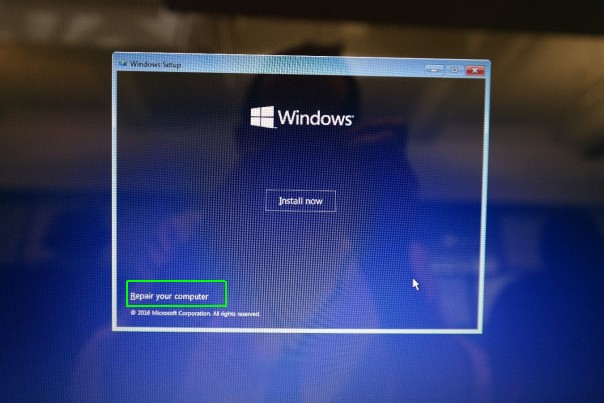
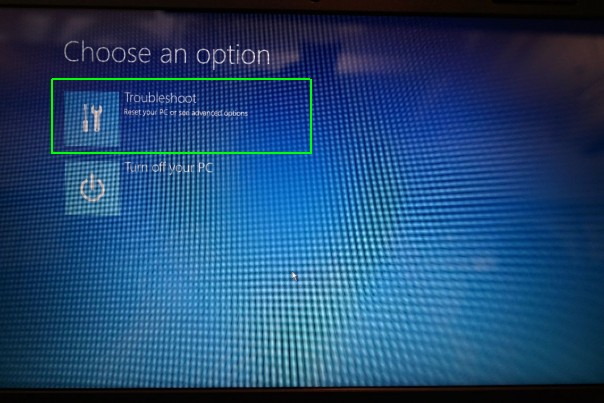
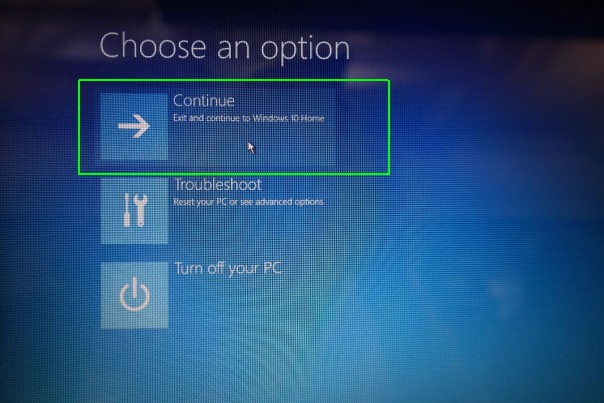
- While installing Windows screen, select Repair your computer and select Troubleshoot. Always keep in mind that you are not supposed to choose Install Window option.
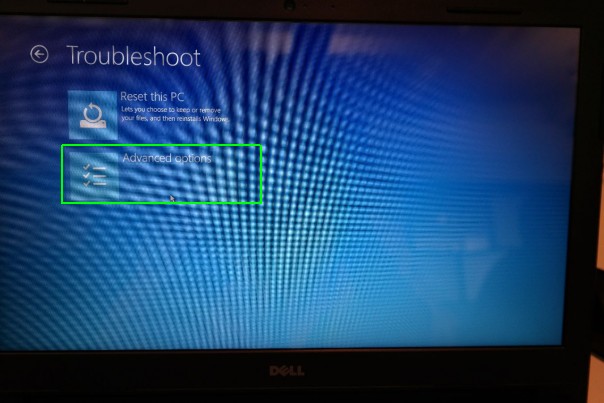
- Now click the Advanced options and then select Automatic Repair on Start-up Repair.
- After doing so, Windows will search for the operating systems installed on your system. Now select your operating system to repair.
If automatic repair find and repairs your computer and you are good to go. If this method is unable to repair the computer then move to the second method below. After completing the repair process, keep in mind to remove the installation media and then boot/reboot otherwise it will go back to the setup. If Automated Repair fails then you can further proceed with another trick mentioned below:
Follow below given steps after Performing Automatic Repair Process:
- Insert your installation media into the computer.
- Boot to the media. We had to press F11 during bootup on the Dell we fixed up to reach this menu, though these keys can differ depending on your laptop’s make and model.
- Click Next on the Windows Setup menu.

- Click “Repair your computer.”
- Choose Troubleshoot.
- Select “Advanced options.”
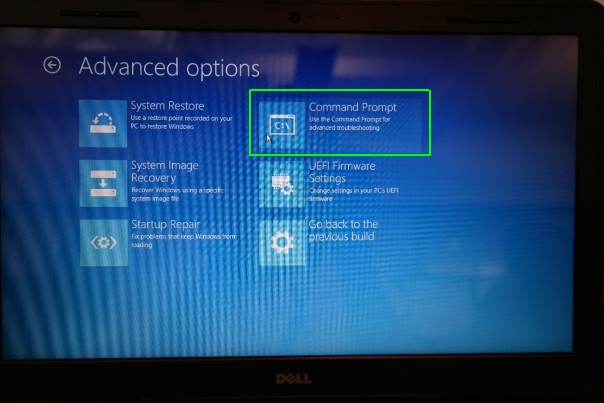
- Pick “Command Prompt.”
- Type Bootrec /fixmbr and press the enter key.

- Type Bootrec /fixboot and press the enter key.

- Type Bootrec /scanos and press the enter key.
- Type Bootrec /rebuildbcd and press the enter key.
- Type “A” to add the installation to the boot list and hit enter.
- Exit the command prompt with the X button on the top of the window.
- Click “Continue” to go to your desktop.
Conclusion:
If you face any issue with your computer or a laptop/notebook you should try using the Reimage Repair. It can scan the repositories and replace corrupt and missing files. The works in most cases when the issue is originated because of a system corruption.