Windows 10 is a fantastic operating system with lots of amazing features and very easy to use. It is also very fast, just like its predecessor Windows 8.1, but it seems that it doesn’t always stay like that.
In a lot of cases, after using Windows 10 for a while, the PC start performing slow and lagging. Well, the most common reasons responsible behind this is the Windows services and desktop program installed.
And uninstalling or disabling certain Windows 10 services will help you to boost the performance.
So today in this article I’ll be going to describe the list of Windows 10 services that you need to disable to fasten your PC.
But before moving further check to some information about Windows Services
What is Windows Services?
Windows Services are executable programs that run regularly in the background and run functions of their own. Well some services come by default along with the operating system. And with times different third party software also adds services of their own.
Some services run in the background and allow some tools to function better but make the Windows PC to perform sluggishly. So disabling the ones that are not required will help you to increase the system performance.
How Disabling the Windows Services Help to Fasten Windows 10?
Well, the services running in the background eat up the entire resources and even take up the memory while booting.
So it is worth to end the unwanted services in order to increase Windows 10 performance. The whole process is easy and as offers clear improvements.
Please Note: There are many services that are core Windows functions and implemented as a service. And disabling them will make the Windows to stop working properly.
So be sure to disable the unnecessary Windows 10 services that won’t have any adverse effect on your Windows 10 operating system.
List of Safe-to-Disable Windows 10 Services to Boost Performance
Here check the list of services that can be disabled to increase Windows performance and make it fast.
1. Fax: In Windows 10 the Fax is a third party service and interferes with the system and as a result slows it down.
Follow the steps to disable it:
- First go to Control Panel > choose Programs and features
- Then on the left side choose Turn Windows Features on or off
- Next locate the Print and Document services.
- Choose the plus sign to expand.
- Now remove check mark from Windows FAX and Scan.
- Click OK.
In this way you can disable the Windows 10 Fax service.
- Or else just go to Control Panel > Administrative Tools > Services > disable “Fax” Service, to disable it.
- Next double click Fax > set the Start up Type to Disabled > press Stop button if available > press OK
2. Diagnostic Policy Service: This service also runs in the background and performs certain functions of their own. Many users have also reported this causes the high CPU usage
So, this can be disabled to make the device perform better.
Here know how to disable it:
- Press Windows + R key > type msc.
- Now a Windows Open > locate Diagnostic Policy Service
- Right click Diagnostic Policy Service > click Disable
In this way you can disable the Windows Diagnostic Policy Service, and to enable it follow the same steps and enable it.
3. Security Center: The Security Center is a Windows operating system component introduced by Microsoft in Windows XP and Vista also. This is not so useful service but start running in the background while you boot up the device.
So disabling it will not harm your PC and even make it run fast.
Follow the steps to disable it
- Right click the Start button > choose Computer Management
- From the left menu choose Services
- Now locate Security Center right click on it > select Disable
In this way the Windows security center is disabled and to enable it follow the same it steps.
4. Print Spooler: This is a program that manages all printings jobs, sent to the computer printer or to the print server. It is recommended to disable only if you are not having a printer.
Follow the steps to disable it:
- Right click Start button > select Computer Management
- Select Services from the left menu
- Scroll down to Print Spooler right click on it > select Disable
Now your printer spooler service is disabled and when you need to enable it follow the same steps and click enable.
5. Application Experience: This service is a latest service introduce in Windows Server 2003 Service Pack 1 (SP1). You can disable it as this is not a needed Windows services.
Follow the steps:
- Press Windows + R key > type msc.
- Now a Windows Open > locate Application Experience Service
- Right click Application Experience > click Disable
You May Also Read:
- 7 Powerful Windows 10 Performance Tweaks For Improved Gaming
- Top 5 Hidden Features to Boost Windows PC Performance
- 21 Must to Use Tips For Lightening Fast PC Performance
6. Secondary Logon: Well, if you are not so found of playing high graphics game then you can disable the secondary logon service. This allows the administrators to log on with non-administrator for performing administrative functions with logging off.
Follow the steps:
- Press Windows + R key > type msc.
- Now a Windows Open > locate Secondary Logon Service
- Right click Secondary Logon > click Disable
In this way it is disabled and to enable follow the same steps and select enable option.
7. Program Compatibility Assistant Service: This service detects the compatibility issues in older programs. It gives users warning about the incompatible programs and won’t allow you to run it.
This is can also be disable by follow the same steps:
- Right click Start button > select Computer Management
- Choose Program Compatibility Assistant Service from the left menu
- Scroll down to Program Compatibility Assistant Service right click on it > select Disable
8. Portable Device Enumerator Service: This help the users to enable the applications like Windows Media Player and Image Import Wizard for transferring and synchronizing content by making use of the removable mass-storage devices.
This is also another unnecessary service and can be disabled:
Here know how to disable it:
- Press Windows + R key > type msc.
- Now a Windows Open > locate Portable Device Enumerator Service
- Then right click Portable Device Enumerator Service > click Disable
9. Offline Files: The Offline Files is also known as (CscService) service. It is a default service in Windows 10 and this is used for performing the maintenance activities like Offline Files cache, and as well respond on user’s login and logoff events.
If you want to disable it follow the steps:
- Right click Start button > select Computer Management
- Choose Offline Files Service from the left menu
- Scroll down to Offline Files Service right click on it > select Disable
10. Windows Image Acquisition: This service enables imagine and graphics applications to related with the imagine hardware and regulate interaction between different applications and scanners.
Well, this is quite helpful for those who are using scanner. But if not then it is worth to disable it from running it background and eating up the resource.
Steps to disable it:
- Right click Start button > choose Computer Management
- Choose Windows Image Acquisition (WIA) from the left menu
- Locate Windows Image Acquisition right click on it > select Disable
In this the WIA is disabled and for enabling it in future you can follow the same steps.
11. Windows Connect Now: The WCN or Windows Connect Now is a simple and secure service for the network access points and devices such as printers, cameras and PCs for connecting and exchanging services. So if you are not using printers, cameras, then this can be disabled easily.
Follow the steps to disable it:
- Press Windows + R key > type msc.
- Now a Windows Open > locate Windows Connect Now
- Then right click Windows Connect Now > click Disable
So this is all about the third party services that are required on the Windows 10 device and can be disabled to improve the Windows PC performance.
However if you want to disable the entire third party services at once then follow the below given steps:
# Make use System Configuration Window
This is a process that allows you to disable the entire third party services at one quickly. This is an easy step to disable Windows 10 third party services.
Follow the steps:
- Hit Windows + R key > type msconfig > press Enter or click OK.

- Next navigate to Services tab > check the Hide all Microsoft services checkbox > click Disable all.

- After that click on Apply > OK to save changes.
- And when the confirmation message appears > click on Restart.
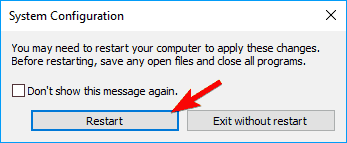
In this way you can disable the entire non-Microsoft services from the beginning. Well, you can uncheck the individual services for preventing them from starting.
Final Verdict:
So, this all about the Windows 10 third party service that causes the Windows 10 system to lag and slow.
Here I tried my best to put together some of unnecessary services and the process to disable it for improving your Windows 10 performance.
You can also uninstall the unnecessary apps, software to free up the space and boost Windows 10 performance.
Apart from that always delete the temporary files, scan your system with good antivirus software and remove unwanted software time to time to maintain the Windows PC performance and other boot up issues.
You can also make use of the Windows Repair Tool, to fix various Windows related issues and errors. This also help you to optimize the performance of the Windows operating system. It is easy to use even a novice user can use it.

