The Qtnetcomp.dll is a file that stores important information about how the program or a Windows service needs to run. The error message appears when the Qtnetcomp.dll file gets damaged or lost from the Windows system. User faces this error at start up interval or at the time while running the program or any Windows operations. User may face this error message when there is an error in computer. So user need to get rid of it as fast as they can and for this apply the below given steps to fix this error in Windows 8, 8.1 or 10.
Step 1: Entire established apps should be blocked
For Windows 8, 8.1 and 10:
1: Push Windows button + X in the keyboard and choose the Task Manager.
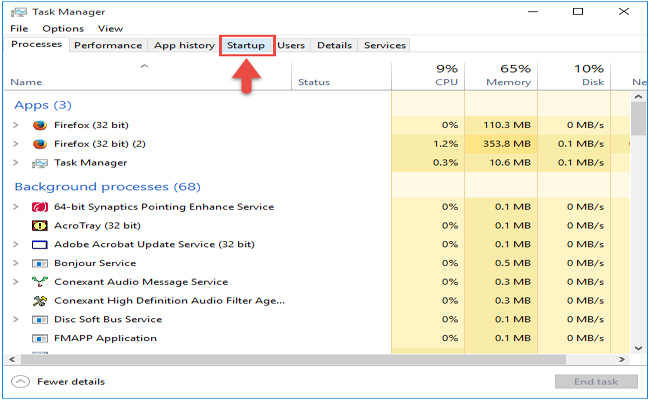
2: and click on the “More Details” icon.
3: Then click on the Startup tab.
4: Verify the entire folder presented in the startup that includes the Executable File. And click right on items and selects the Open file location.
5: Now close the Window and restart your PC.
For Windows 7 and Vista:
1: Click on the Start button and the choose Run.
2: And at the run type “MSCONFIG” and click OK. Then System Configuration dialog box will appear.
3: then go to Startup Tab.
4: Check the File Name and File Path of every startup application. Check particular columns. If Qnetcomp.dll is presented into the startup list and the uncheck it and click on Apply and after that OK.
5: Restart your PC.
Step 2: Repair your PC
User may face this error because of unnecessary changes or due to latest installed application, so reset your PC with the help of given ways for different windows OS users.
For Windows 7 and Vista:
1: Click on Start All Programs and then click on Accessories.
2: After that click on System Tools.
3: Then click on the System Restore option.
4: Now follow the System Restore wizard, and select a restore point.
For Windows 8 and 8.1:
1: Push the Windows button + X; and choose Search.
2: Then in the search box type “Restore” in text box and press enter key.
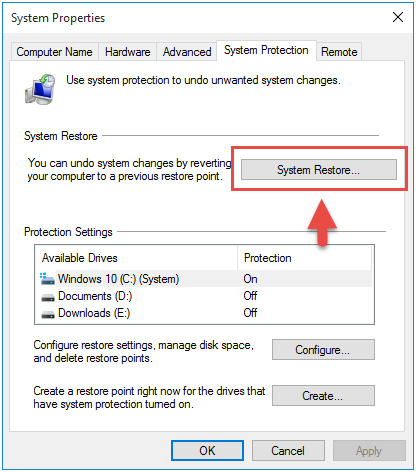
System Protection tab Choose “Create a restore point” from the Search Results.
4: Now a new dialog box will start known as System Properties with default System Protection tab.
5: And lastly click on the System Restore button and follow the instructions given.
For Windows 10:
1: Click right on My Computer icon and select Properties.
2: Now click on “Advanced System settings” situated at the left side panel.
3: Click on the Advanced tab and then on System Protection tab.
4: And lastly click on the System Restore button.
Step 3: Clean Windows Registry
System registry stores all information that all the software, files, application codes and hardware runs. And this also contains problematic components that cause QTNetComp.dll error. And when the registry is cleaned these errors are fixed. And prevent the error from the registry entries used need a professional repair tool. Below you can find the details of the professional repair tool.
Step 4: Attempt to Repair the Deleted File
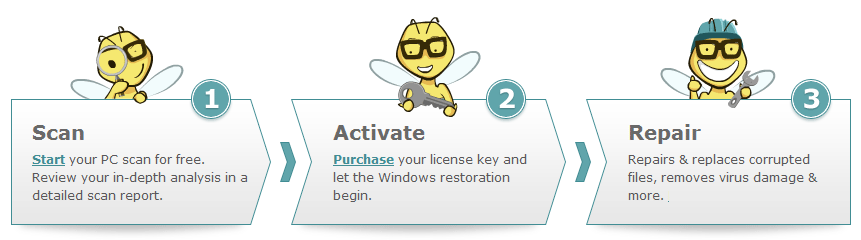
It may happen due to accidental deletion of DLL files the error may occur. It is a very common problem so user need to check the recycle bin of your system and it is presented there than you can restore it from there but if it is not and also the above given steps did not help to fix the error than make use of the professional repair tool the PC Repair tool it is very essential tool and specially designed to fix all types of Windows relates issues like Registry errors, DLL errors, Application errors, slow PC performance and many others. It is easy to use, only user need to download and install it on the PC, it automatically scan the PC and fix all the issues presented in the Windows OS.