Are you the one getting the error 0xC1900101 – 0x20017 while installing or upgrading Windows 10 it fails and starts showing the error message? Then this article is for you here check out the complete information what goes wrong with your Windows system and how to fix it.
Windows 10 is a free upgrade but in many cases, the users are facing issue and errors as the upgrade process is not smooth. Some users are found reporting about the Windows 10 installation error 0xC1900101 – 0x20017.
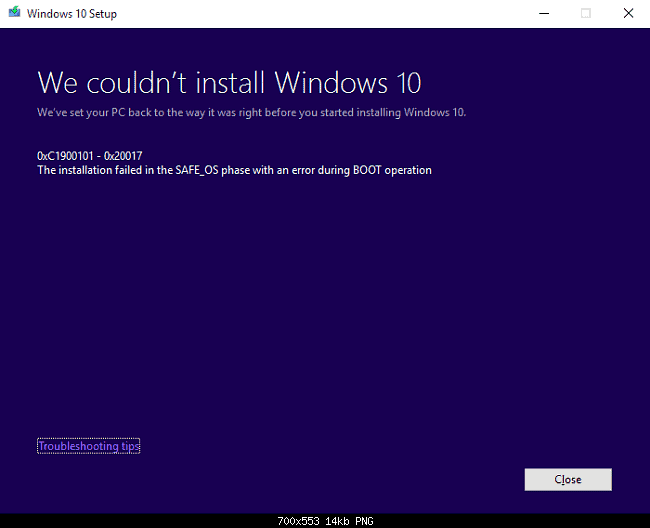
Shows the error message “The installation failed in the SAFE_OS phase with an error during BOOT operation”
Other related error
0xC1900101 – 0x30018 Failure of installation in FIRST_BOOT phase with an error while SYSPREP operation
Commonly the error message appears while trying to upgrade or the Windows 10 installation manages to get to 100% but the computer starts showing the 0XC190010 – 0x20017 errors and shows the installation failed message.
Well, this is irritating but can be solved after following certain fixes in Windows 10.
How to Fix 0xC1900101 – 0x20017 Installation Error in Windows 10
To fix the error you need to try different working solutions to fix the 0XC190010 – 0x20017 installation errors in Windows 10. But before moving further try some easy tweaks like restarting your system, disable the third party antivirus program, apart from mouse and keyboard get rid of any extra device connected and check if the error is resolved or not.
Or else try the below-given solutions one by one.
Solution 1 – Uninstall Bluetooth and Wireless Drivers
As per a report, Broadcom drivers are not compatible with Windows 10 operating system, so check if you are using these drivers then simply uninstall them before upgrading to Windows 10 and try installing the update.
Follow the steps to do so:
- Open Device Manager > locate the Bluetooth driver on the list.
- Now right click the driver > select Uninstall device.
- And repeat the same process for wireless network driver.
Now check the 0XC190010 – 0x20017 Windows10 installation error is resolved or not.
You May Also Read:
- Top 8 Tweaks to Fix Windows Update Error 80244019
- [SOLVED] Windows 10 Creators Update Installation Stuck Issues
- Top 10 Windows 10 Installation Issues and their Fixes
Solution 2 – Disable Wireless from BIOS
Well if you are still getting the same error then disable the wireless from BIOS. This helped many users to fix the Windows 10 error.
Follow the steps to do so:
- Reboot your computer and during booting continuously press F2 or Del key to enter BIOS.
- And in BIOS > go to the Advanced Tab
- Now in Advanced Tab move to Wireless option > hit Enter to open it.
- Here two options appear – Internal Bluetooth & Internal WLAN.
- Press Enter to disable them both and choose Disabled from the list
- Next hit ESC key to go to the main screen > choose to save changes before exiting.
Well, it might happen the BIOS version might differ in your computer.
Solution 3: Remove Additional RAM
Well if the above-given solutions won’t help you then check if you have added additional RAM to your PC, then this might be causing the issue. So remove it temporarily and try installing the update or upgrade your Windows 10 operating system.
And if the update installs without any issue then again add the extra RAM to your PC.
Solution 4: Remove Entire Unwanted Drivers
If you have some unwanted drivers installed on your PC/laptop, then uninstall all of them and after that try upgrading to Windows 10.
It is found that the outdated or useless drivers conflict with the latest operating system and cause error 0XC190010 – 0x20017 in Windows 10.
Solution 5 – Make use of the Media Creation Tool
Well if none of the above given manual solutions works for you then make use of the Media Creation Tool to install Windows 10.
Follow the given instruction to run it:
- Download Media Creation tool
- Backup your data and license key.
- Now start desktop client > click Upgrade this PC.
- The tool allows you to install the available updates.
- As the entire process is completed > restart your PC
Hope that now the Windows 10 installation error is fixed but if not then make use of the automatic solution to fix Windows 10 installation error 0XC190010 – 0x20017.
Fully Automated Solution:
Scan your PC/laptop with the professional recommended Windows Repair Tool to fix Windows 10 related issues and the update errors. This tool is designed with the advanced algorithm and is able to repair most computer errors, and also protect you from file loss, malware, hardware failure and optimize your PC for maximum performance. Quickly fix PC problems like BSOD, DLL error, Registry issues, drivers issues, application error and many others and prevents others issues automatically with this software.
Conclusion:
Hope the given solutions help you to fix 0XC190010 – 0x20017 Windows 10 errors.
Try the given solutions one by one and check which one works for you. However if none of the given manual solutions works for you then try performing the clean installation of Windows 10.
Or else scan your system with the Windows Repair tool; this is the best tool that just by scanning once fixes various Windows update related errors and issues.
Apart from that also keep your operating system and drivers updated, also scan your system for viruses/malware to avoid other Windows issues.
Additionally, if you find the article helpful or have any query, comment, questions or suggestions related to it, then please feel free to share it with us in the comment section below or you can also go to our Fix Windows Errors Ask Question Page.
Good Luck!!!

